• Menu
  • Skip to primary navigation
  • Skip to main content
  • Skip to footer

COFESS

City of Faith Employee Self Service

  • Company Info
    • Core Values
    • Employee News
    • Benefits
    • Company Awards
  • Training
    • Annual Training
  • Forms Bureau
    • General
    • HR & Accounting
    • Maintenance
    • Security
  • Policies, Process, IR Archives
    • FaithWorks: Processes
    • IR Archives
    • Policy & Procedures
  • My Profile

Mblox IT

Tech Tuesday Series 2:Part 3 Password Sharing and our Shield Wall

December 12, 2023 By //  by Mblox IT

Announcements 

  1. Tomorrow is City of Faith’s Annual Christmas Party 
  2. A 4th COF jacket order is coming.  
  3. Microsoft Teams Deadline has been extended to February 14th. 
    1. 2 additional training sessions will be held over Teams. The first will be Wednesday December 20th.  
  4. The last pass training sessions will be conducted in February while I travel to each location. 


Last Pass Password Sharing  

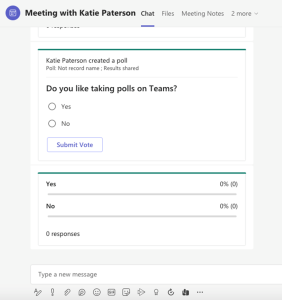
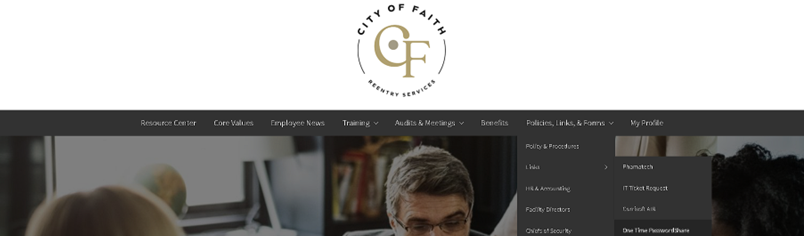
City of faith deploys two ways to do password sharing. The first is through https://1ty.me/  as pictured below. You can find all of this here 


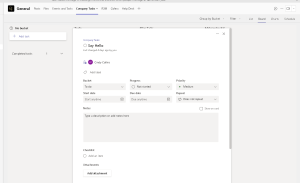
The other method which is more secure is by using Last Pass. Last Pass has a built-in password-sharing feature that can be found by going to your vault.  

  1. Go to the password you want to share with others. 
    1. This can be found by scrolling through the passwords or by typing in the URL or site name of the password you’re looking for. For the purposes here I’ve used the URL  DummyUrl  


      1. The Password can be viewed by hitting the wrench icon. 
    1. After you hit the wrench, you can then view the Password by clicking the eyeball.   
  1. To Share the password, you hit the person icon next to the wrench on the search screen.  
    1. You then fill out the pop-up box that will appear. 


    1. The email address would be the email of the person you want to share this with, the allow recipients to view the password gives them the ability to view the password.  
    2. Then make sure you hit share. 
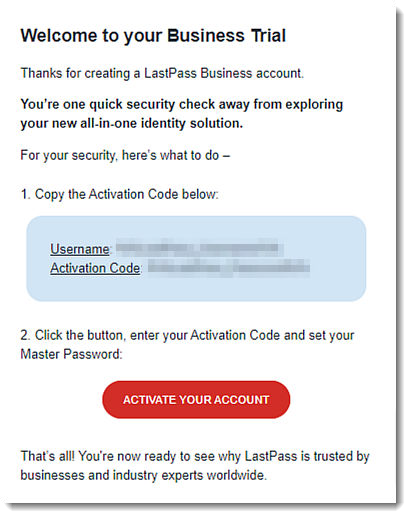
    3. The user will then receive an email with a link authorizing them to view the shared password. 


    1. I have  shared the password link with all of you created in this process feel free to let me know where the journey took you this time. It’ll show up in your sharing center under shared items.  

Tools we use to protect ourselves. 

The greatest tool against getting scammed is first and foremost your brain and critical thinking skills. But outside of that COF has some great tools we use to minimize the threat.   

    1. Cloud Storage- Storing resident data on local computers is a slippery slope in today’s era and leaves our clients and staff vulnerable to identity theft and fraud. We utilize a virtual cloud hosted server through Revver(formerly Efile) to store all resident files.  
    2. Anti-Virus and Firewalls- All COF devices should have antivirus installed on their devices. We use Trend Micro. This allows us to put in companywide safeguards including URL filtering, and malware protection for those trojan style viruses. (If you for some reason do not have antivirus, see IT) 
    3. MDM – MDM or Multi Device Management allows our systems to be on the same program and see current vulnerabilities and adjust policy instantly to all devices as they occur. We do this through Microsoft 365. (If you for some reason do not have MDM, see IT) 
    4. Last Pass- Last pass allows us to securely store and save passwords making it easier to meet security requirements such as NIST 800-53 and FedRamp requirements (like those 90-day password changes). (If you for some reason do not have LastPass see IT) 
    5. 2(multi) factor Authentication- Most people are probably familiar with this process through systems such as R3M. When you type in your email it sends you a code and then requires your password input as well. This will be coming  to all COF programs that offer it within the next year. I recommend utilizing a Authenticator app to make your life easier See Here  
    6. Forms Bureau- The Forms Bureau allows us to maintain, contain, and retain company proprietary information and is HIPPA compliant. The forms bureau is on cofess (if you don’t know how to access this information see IT). 
    7. Company Policies and Secure Access- We maintain a secure access policy in compliance with FedRamp and NIST regulations that basically state the lowest access needed for all parties to do their jobs. For example, Case Managers can’t access Employee files because that doesn’t pertain to their job.  Anyone who does any hiring has access to a form that sets these access controls and must fill it out even in cases of temporary access requests.  


More about Scams 


Instead of going over these 1 by one I’m going to provide you with a list of scams I’m familiar with and if you see something say something. The majority of scams that will be up to you to watch out for are called social engineering scams. These are scams where the perpetrators have created a scenario that will lure you the user into a situation that is favorable to the scammer.  

Certainly, there are various scams on the internet that people should be aware of to protect themselves. Here are some common examples: 


1.  Phishing Scams:  

   –  Email Phishing:  Fraudulent emails that mimic legitimate sources to trick users into providing personal information, such as login credentials or financial details. 

   –  Website Phishing:  Fake websites designed to look like legitimate ones to steal login information or financial data. 


2.  Online Shopping Scams:  

   – Fake online stores that offer products at extremely low prices to lure customers but never deliver the goods. 


3.  Tech Support Scams:  

   – Unsolicited calls or pop-ups claiming to be from tech support, stating that your computer has a virus and offering to fix it for a fee. Legitimate tech support companies don’t contact users this way. 


4.  Lottery or Prize Scams:  

   – Emails or messages claiming you’ve won a lottery or prize, but to claim it, you need to provide personal information or pay upfront fees. 


5.  Romance Scams:  

   – Scammers build a romantic relationship with someone online and then request money for various reasons, such as a medical emergency or travel expenses. 


6.  Investment Scams:  

   – Fake investment opportunities promising high returns with little or no risk. Always be cautious and research thoroughly before investing. 


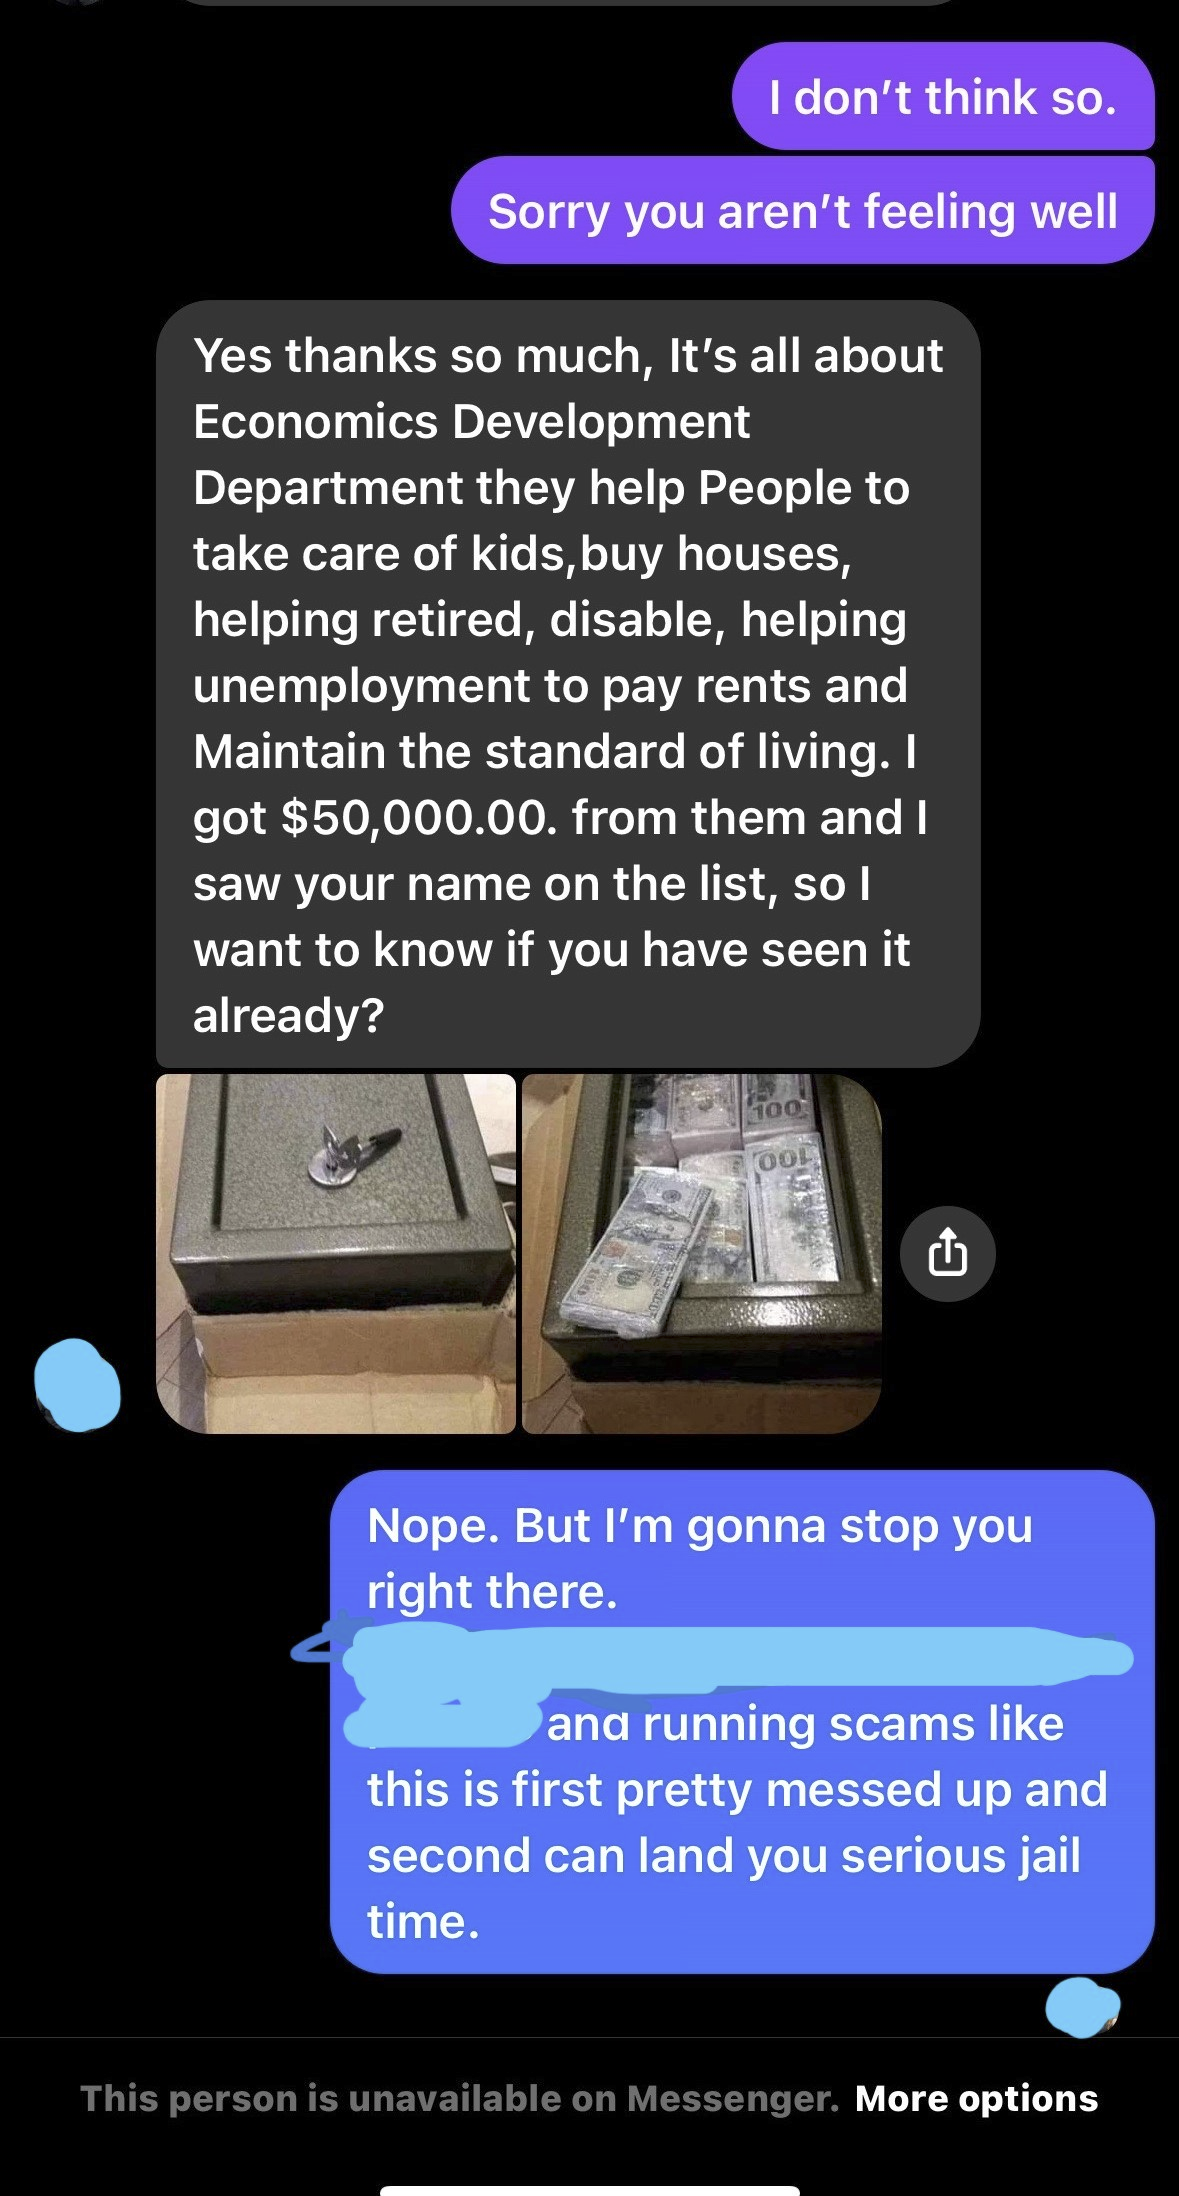
7.  Social Media Impersonation:  

   – Fake social media profiles impersonating someone you know or trust, aiming to extract personal information or money. 


8.  Job and Employment Scams:  

   – Fake job offers that require payment for training or materials, or requests for personal information that can be used for identity theft. 


9.  Cryptocurrency Scams:  

   – Fake ICOs (Initial Coin Offerings), fraudulent exchanges, or Ponzi schemes in the cryptocurrency space. 


10.  Ransomware Attacks:  

    – Malicious software that encrypts your files and demands payment for their release. Regularly back up your data and be cautious with email attachments. 


11.  Freelance Scams:  

    – Fake job listings that require payment for access to opportunities or promise payment for work that is never actually completed. 


Always exercise caution when dealing with unfamiliar websites, emails, or messages. Be skeptical of unsolicited communications and verify the legitimacy of sources before providing personal or financial information. Keep your software and antivirus programs up to date to protect against malware and other online threats. 


As always this can be reviewed on the City of Faith Help Desk or on Cofess. 

Thanks,
 

Filed Under: Employee News, Tech Tuesday

Tech Tuesday Series 2 part 2 Scams Likely and Last Pass Set up

December 5, 2023 By //  by Mblox IT


Announcements:

  1. Congrats to Ms. Coleman on Winning The Trailblazer Award!
  2. Forms Bureau is in full swing if it’s on Cofess it’s good to use. Please contact me if you have questions!

In order to continue our Journey in becoming more secure as a company I got a lot of requests for a tutorial on how to sign up for Last Pass. So I’ll bump password sharing to next week’s article. First let me stress this is an amazing password manager available to every person at this company just for being an employee. It is a secure way to share and store passwords and it notifies you if a password was seen on a data breach.

Last pass helps also helps us as a company reduce how often and how managed our passwords need to be by managing one password and letting Last Pass take care of the rest.

TABLE OF CONTENTS

    • Join a LastPass business account as a new user
    • Other Types of Scams
      • Adware
      • Phishing:
      • Some helpful advice for cyber security in general.
  • Don’t Be like Grumpy Cat


CyberSecurity Memes and Phishing Memes of 2023 - Part 2


Join a LastPass business account as a new user

You can join your company’s LastPass Business or LastPass Teams account (once you’ve been invited by a LastPass admin) by activating a new LastPass account.


The steps below outline the activation experience for a brand new user whose email address was not associated with any existing LastPass account.


  1. Open the Welcome email you received from LastPass with the subject line, “Activate your account to get started.”
  1. Copy the Activation code.
  2. Select Activate Your Account.

A screenshot of a computer screen Description automatically generated

  1. Once redirected to the “Finish account creation” page, paste the Activation code into the field (your LastPass email address is already pre-populated for you).
  1. Create a new master password, then re-enter it to confirm. If desired (recommended) set a Reminder – this is a clue that is sent in a reminder email to help you remember your master password if it is ever forgotten).
  2. Select Continue

A screenshot of a login form Description automatically generated


Result: Your LastPass vault is then de-crypted and re-encrypted to use your newly created master password to log in to LastPass going forward. 

  1. Once your account is created, choose from the following options for installing the LastPass browser extension:
    • If you already have the LastPass installed, click OK on the confirmation page, and you are redirected to your LastPass vault.
    • If you do not have LastPass installed, you can click Install LastPass on the confirmation page to install the LastPass browser extension and log in.


     8. You have successfully activated your LastPass Business or LastPass Teams account, and are now logged in to your vault.

Other Types of Scams

Password Protection isn’t the only way we avoid scammers and having our information stolen.

Adware

Scammers often hide malicious software in pop-ups and links. It’s crucial never to click on a link if you’re unsure of its destination, and the same caution should apply to unfamiliar articles or pop-ups. For more information, click Here!

Phishing:

Beware of scammers who may reach out, pretending to be familiar contacts or trusted sources like Windows Defender. I recently experienced such an incident myself. The scammer posed as a friend, using a common tactic that I’ve observed affecting others in our community.


Typically, these scammers initially pretend to be someone you know, perhaps a distant acquaintance or relative. They often provide a plausible excuse for not engaging in a video call or phone conversation, citing reasons like a sore throat, as was the case in my encounter. Following this, they attempt to establish contact with you and then proceed to boast about the success of their fraudulent activities, often involving a significant sum of money.


Subsequently, they may claim to have come across your name on a certain list (there’s almost always some list involved) and offer to assist you in acquiring a similar financial gain. However, this is where it takes a turn for the worse—they typically request something less traceable, such as Apple gift cards or funds through cash apps. They will invent reasons for being unable to perform the requested actions themselves.


If you find yourself in such a situation, it is advisable to promptly change your password on the relevant platform and clear your browsing history. Stay vigilant and exercise caution to protect yourself from falling victim to these scams.


Some helpful advice for cyber security in general.

CyberSecurity Memes and Phishing Memes of 2023

Don’t Be like Grumpy Cat

11 hilarious cybersecurity memes of cats

Filed Under: Employee News

Weekly Tech Review Series 2 Week 1 Password Security

November 21, 2023 By //  by Mblox IT

Announcements

1. Revver Check ins Start this week so check in all your files by Friday.

2. All requests must have a ticket to be completed.

3. Special Congratulations To Carlos Reyes for Making it as a US citizen!

4. We’ve started migrating to Teams. If you have not logged into teams please get with me so we can get you moved over. The goal is drop Group me at the 1st of the Year.

5. Have a good Holiday Everyone!

Lets Talk about Passwords Security

Password security is crucial for several reasons, as it plays a fundamental role in protecting sensitive information and maintaining the overall security of digital accounts. Here are some key reasons why password security is important:

1.  Protecting Personal Information: 

   – Passwords act as a barrier against unauthorized access to personal and sensitive information. They safeguard details such as emails, financial transactions, and private messages.

2.  Preventing Unauthorized Access: 

   – Strong passwords help prevent unauthorized individuals from gaining access to your accounts. This is essential for maintaining privacy and ensuring that only authorized users can access sensitive data.

3.  Securing Financial Information: 

   – Many online accounts are linked to financial information, such as banking and credit card details. A secure password is a critical line of defense against financial fraud and unauthorized transactions.

4.  Safeguarding Business Data: 

   – In a business context, password security is vital for protecting proprietary information, customer data, and other sensitive business-related materials. Compromised passwords can lead to data breaches and significant financial losses.

5.  Preventing Identity Theft: 

   – Strong passwords are a deterrent to identity theft. Cyber-criminals often target personal information to impersonate individuals for fraudulent activities. A secure password helps mitigate the risk of identity theft.

A sign on a wall Description automatically generated

Don’t put your password out in a public forum ever. Use secure password sharing. There’s a link on cofess and the help desk for this.

6.  Mitigating Cybersecurity Threats: 

   – In the era of cyber threats and hacking, a weak or compromised password is one of the easiest ways for attackers to gain unauthorized access. Strengthening passwords helps mitigate the risk of cyber attacks and protects against various online threats.

7.  Maintaining Online Reputation: 

   – A compromised account can be misused to spread false information, engage in malicious activities, or damage your online reputation. Secure passwords help maintain the integrity of your online presence.

8.  Compliance with Regulations: 

   – Various regulations and laws, such as GDPR (General Data Protection Regulation), mandate the protection of personal data. Adhering to password security best practices is essential for compliance with these regulations.

9.  Preventing Credential Stuffing Attacks: 

   – Cybercriminals often use automated tools to launch credential stuffing attacks, where they use stolen usernames and passwords from one site to gain unauthorized access to other accounts. Strong, unique passwords help mitigate the success of such attacks.

10.  Encouraging Responsible Online Behavior: 

    – Promoting good password hygiene encourages responsible online behavior. This includes practices such as using unique passwords for different accounts, regularly updating passwords, and avoiding easily guessable information.

City of Faith Mitigates these concerns by using things Like Last Pass. Once everyone is on last pass Password Changes will become stricter, more routine, and instrumental.

How Do I make a Secure Password? 

To create a secure password you’ll remember can be tricky. Start with something simple like a passphrase but replace a letter with a symbol and add a number series at the end.  Just make sure you can remember it too. For Example “ForEverSecure” might become “43ver$EcUre!”. Alternatively Password managers typically have a way to generate passphrases and set up changes. Get with me if you have questions on this!

A close up of a spiral Description automatically generated

If you haven’t set up your last pass get with me and follow the recommendations in the article Here. A few of you will have to meet with me 1 on 1 during my next travel session.

If you can’t get into the account submit me a ticket!

Next week we will review secure password sharing via Last Pass and how to add a password to the account.

Filed Under: Employee News

Weekly Tech Review 10-31-23 Tricks of Teams

October 31, 2023 By //  by Mblox IT

Announcements

  1. HAPPY HALLOWEEN!!!
  2. Starting This week every Friday at 5PM all Revver Documents will be checked in automatically. Please Make sure you are saving your documents back to Revver prior to leaving to avoid any data loss. 
  3. 2 weeks Left until City of Faith Moves from Group Me To Teams.
  4. No Tech Tuesday Next week

Joining a meeting in Microsoft Teams is a straightforward process, whether you’ve been invited to a scheduled meeting or you want to join an ad hoc meeting. Here are the steps to join a meeting in Teams:


Meetings and Calls

1.   Scheduled Meeting:

If you’ve been invited to a meeting that’s already scheduled, you can join it by following these steps:


  1. Open Microsoft Teams on your computer or mobile device.
  2. Look for the calendar icon on the left hand sidebar, and click on it. (or the bottom bar on mobile) This will show your upcoming meetings and appointments.
  3. Find the meeting you want to join in the calendar list.
  4. Click on the meeting to open its details.
  5. Click the “Join” button when it’s time to start the meeting. If the meeting has not yet started, you may see a “Join” button that’s grayed out until the host initiates the meeting.

2. AD HOC Meetings

If you want to start an ad hoc meeting or join a meeting without a prior invitation, you can initiate the process yourself:

  1. Open Microsoft Teams.
  2. In the left hand sidebar, click on the “Meetings” or “Calendar” tab (varies based on version.
  3. Click the “Meet Now” or the Camera Icon on Mobile button to start an instant meeting. You can invite participants by adding their names or email addresses.
  4. If you’ve been invited to an ad hoc meeting, you’ll typically receive a chat message or notification with a “Join” button. Click that button to join the meeting.


3.   Join by Link:

If you’ve received a meeting link (URL) from the meeting organizer, you can join a meeting using the link:


  1. Click on the meeting link provided in an email, chat message, or calendar invite.
  2. If you have the Teams app installed, it will open and take you directly to the meeting. If you don’t have the app, you may be able to join the meeting using the web version of Teams.


4.   Dial In Option (Phone):

  1. Microsoft Teams also offers a dial in option for meetings. If the meeting organizer has provided a phone number and conference ID, you can dial in to join the meeting by phone.


  1. Dial the provided phone number.
  2. Enter the conference ID when prompted.


Video and Audio Settings:

Before you join a meeting, you can select your camera and microphone preferences and choose to mute or unmute yourself. You can also choose your preferred audio device if you have multiple options.

Cool Features of Microsoft Teams

1. Meeting recap

If you’re not able to attend a meeting live (or you just need a recap), Teams lets you easily revisit the meeting material.

As soon as a meeting ends, Teams automatically saves all material associated with the event: the video recording (if you recorded it), any shared files, loop components, and if you’re the host, the attendance report. If you switch on live captioning (another awesome Teams meeting feature, by the way—it can even translate into different languages in real time), it’ll save a copy of the transcript too.

You’ll find all the recap material in the meeting Chat window or in the Details section of the invite in your Teams calendar.

2. Virtual whiteboards 

Virtual whiteboards make in office brainstorm sessions seem so inefficient—not to mention boring. Think about it: it’s so normal to have a dozen people collaborating on a virtual whiteboard, but can you imagine everyone huddled around an office whiteboard with a marker in their hand? ????

Teams’ virtual whiteboards go above and beyond, making it feel like a bespoke online whiteboard app.

You can drag and drop images and video directly onto a whiteboard and create shapes like arrows and perfect rectangles without trying to (very badly) draw them on the board freehand. But my favorite part is the templates. There’s a full catalog of different meeting related templates (e.g., brainstorming, SWOT analysis, and affinity diagrams) that you can drop on your board and start scribbling on as the basis for your meeting.

To access a virtual whiteboard during a meeting, hit the Share button, and select Microsoft Whiteboard (you’ll see a whiteboard button in the chat menu too).

And yes, whiteboards are also automatically saved to the meeting recap. I swear they’ve thought of everything.


3. Loop components 

The name of this feature makes it sound like you need a CS degree to use it, but it’s actually just a fancy name for a simple concept. Microsoft’s loop components are interactive units that help you collaborate and make decisions together in the chat during a meeting. Think: an agenda, a to do list, or even an event plan.

You send a component during the meeting, and everyone can edit and collaborate on that component in real time. Any loop components you create are saved in the meeting chat and also saved to OneDrive, so you can continue working on them after the meeting too.

To create a loop component, click on the loop icon in the meeting chat window. A few different options will come up—pick the one you want, and start collaborating.

4. Spotlighting 

Looking at 49 faces on a single screen is intense—especially if a few different people will be speaking. The spotlighting feature in Teams allows the organizer or presenter to decide which participant(s) should be the main focus of the meeting, instead of just highlighting whoever showed up to the meeting first.

Spotlighting a participant enlarges their window and brings them to the top of the screen, so they appear more prominently. You might want to spotlight senior management in a team meeting or a panel of people who are going to present.

It’s also easy to switch around who’s in the spotlight: click the three dots to the right of their window and hit Spotlight. You can spotlight up to seven people at one time, and the same view will appear for everyone in the meeting. FYI: spotlighting doesn’t show up in meeting recordings, and it also doesn’t work if you’re in Large Gallery View or Together Mode.

(P.S. Does this all sound terrifying to you? If you’re feeling a little camera shy and want to de spotlight yourself, you can go to People > Participants and click the three dots next to your name. You’ll see the option there to Exit spotlight.)

5. Presenter mode 

There was a time when doing presentations online felt impersonal and clunky. But meeting technology has advanced so quickly that presenting in person now feels pretty old school.

Teams has a few presenter modes you can use when working with slides during a meeting, and they’re all really slick and engaging.

Content only. This is just your slides on the screen.

Side by side. Like it sounds: you and your slides in separate boxes side by side.

Standout. Here, your background gets replaced with your slides, and you hover over the top.

Reporter. Your slides appear in a box above your shoulder like—you guessed it!—a news reporter.

To switch on presenter mode, go to Share in the top right once your meeting starts, and select one of the options under Presenter mode. Hover over the icons, and the name of each option will appear.

You can also switch from one mode to another in the middle of your presentation by clicking the icons that will reappear in the presenter toolbar at the top of your screen.

6. Meeting reactions

If you’ve ever presented online to a sea of people who are all on mute, you know just how awkward it can feel. Not being able to read people’s reactions or get the occasional encouraging nod from your teammates isn’t great for your confidence.

This is where Teams’ reactions feature works really well. There are five different types of reactions participants can choose from—standard fare.

When meeting attendees click on a reaction, the reactions bubble up along the bottom of the presentation slides, so you and everyone else in the meeting can see them. It’s a small touch, but it has a big impact on the vibe of the meeting.

If someone wants to ask a question during the presentation, they can use the raised hand icon—that will bring them to the top of the screen so the host can see them. There’s even a keyboard shortcut for this one (control + shift + K). Just remember to repeat the shortcut to put your hand down again. An important tip for anyone else who’s spent a whole meeting with their hand raised.

7. Together Mode 

When you’re attending remote team meetings day in and day out in gallery mode, it gets a bit boring. So Teams spiced it up. Together Mode makes it look like you and your teammates are all in a room together. Or at least it attempts to.

You can choose from a catalog of virtual venues, including a lecture hall, an amphitheater, or (shock horror!) an office space. It sounds a bit corny, but in my experience, it actually works. There’s just something about seeing your colleagues’ faces in a different format that brings a bit of life to the meeting.

To switch on Together Mode, click the three dots in the meeting menu, and select Together Mode; a list of backgrounds will pop up for you to choose from. Apologies to your 1:1s—for this feature to work, you need to have between four and 49 people in your meeting.

8. Mute notifications 

I learned about this feature the hard way. I was once in the office, presenting online to senior staff, when a notification popped up from someone else in the office asking what I wanted for lunch. Not the most professional moment of my career.

But embarrassment aside, any notifications popping up when you’re in presentation mode—or even just in the middle of a call—can be incredibly distracting. That’s why Teams lets you change your settings so that notifications are always muted during meetings and calls.

Go to Settings > Notifications > Meetings and Calls, and switch on Mute notifications during meetings and calls. This will keep all in app notifications automatically muted for calls until you go back in and change it again.

Keep in mind that this will only mute Teams in app notifications. If you use any other programs that send desktop notifications, you’ll need to mute them separately, or use a notification blocking app.

9. Meeting polls 

If you’re in a meeting and you want to get everyone’s opinion on something quickly, you can run a quick poll in the meeting chat window. Think of it like a “raise your hand if…” moment in an in person meeting.

To run a poll, go to the messaging extensions button (three dots below the chat bar) and search for the Forms app.

Once you select it, the option will instantly appear to create a poll question and potential answers you want to use. Add your question, and hit Send. The poll will appear in the meeting chat window, and the results will come through below the poll in real time.

10. Live Transcription

This awesome feature was created for accessibility purposes as well as making your designated note taker’s job 100% easier. The automatic transcribing feature is perfect for someone who may have missed the meeting and wants to later go back to the meeting recap in the chat to read everything that was discussed or for someone who needs to read captions in real time due to, for example, a hearing impairment or language barrier.


This visual aid appears along the right side of the meeting screen and is labeled by the speaker’s name as well as the time spoken. Check out the link in the photo caption below to learn how to enable live transcription. 


11. App Integration

Seamlessly add several apps to a meeting for things Office 365 or Microsoft Loop.

Microsoft Teams allows you to enhance your collaboration and productivity by integrating various apps and services directly into your workspace. Here’s how to use and add apps to Microsoft Teams:

 (Site your Sources The Above Information Comes from Zapier’s Katie Paterson )

Using Apps in Microsoft Teams:

  1. Apps in the Left Sidebar: When you open Microsoft Teams, you’ll see a left sidebar where you can access various apps and services. This includes features like Chat, Teams, Calendar, and more. You can also access external apps by clicking on the “Apps” icon in the sidebar.


  1. App Tabs: Some apps can be added as tabs within a channel. For example, you can add the Planner app as a tab to keep track of tasks related to a project. To do this:

Navigate to the channel where you want to add the app tab.

Click the “+” icon to the right of the channel name.

Select the app you want to add as a tab.


  1. App Connectors: You can set up connectors for certain apps to receive notifications and updates within a channel(These require an account on the relevant app). For example, I have connected freshdesk to send me a message when someone submits a ticket. To set up connectors:

Navigate to the channel where you want to set up the connector.

Click the ellipsis (…) next to the channel name and select “Connectors.”

Configure the connector settings for the app you want to connect.


  1. Messaging Apps: You can integrate messaging apps, like Trello or Asana, to send and receive notifications and updates from these apps directly in your chat conversations. To do this:

Click on the “Chat” tab.

Open a chat conversation.

Click the “…” (More options) icon and select “Apps.”


  1. Bot Integrations: You can integrate chat bots to automate tasks, answer questions, or fetch information from external sources. Bots can be added to individual chat conversations or to channels.


Adding Apps to Microsoft Teams:


  1. From the App Store:

Click on the “Apps” icon in the left sidebar.

Click “Browse Apps” to open the Microsoft Teams App Store.

Search for the app you want to add.

Click “Add” to install the app.


  1. Custom Apps:

If your organization has custom developed apps or integrations, you can add them to Teams by selecting “Upload a custom app” in the App Store and following the provided instructions.


  1. App Permissions: Some apps may require permissions to access your Microsoft Teams data. Be sure to review and approve these permissions when adding the app.


  1. App Configuration: After adding an app, you may need to configure its settings to tailor it to your specific needs. Configuration options vary depending on the app.


  1. Personal Apps: You can also add personal apps and connectors by clicking on your profile picture in the top right corner of Teams and selecting “Settings.” From there, choose “Permissions” and then “Apps.”


By using and adding apps to Microsoft Teams, you can streamline your work processes, access information from various sources, and collaborate more effectively with your team.


The Next Tech Tuesday will focus on our next series Network and Internet Safety protocols starting with Password Sharing and Last Pass!

Otherwise the  meeting to learn about Teams and have  a Q&A  will be for the Teams Launch party on November 15th at 12PM CST

Join Here

Read this anytime by visiting Cofess and going to Employee News or by utilizing the Knowledge Base.


Filed Under: Employee News

Weekly Tech Review 10-24-23

October 24, 2023 By //  by Mblox IT

Announcements

  1. Starting Next week from today every Friday at 5PM all Revver Documents will be checked in automatically. Please Make sure you are saving your documents back to Revver prior to leaving to avoid any data loss. 
  2. 3 weeks Left until City of Faith Moves from Group Me To Teams. 

Channels and Tasks

There is so Much you can do with Teams Channels and Messaging features. Channels function like Groups and allow for instantaneous communication in a variety of ways.

Check out The Channels

  • Channels function like large scale group chats for group communication
  • There Are Private and Public Channels

Public Channels are for Everyone

  • General- A place to chat regarding company business this channel allows for posts regarding the job we do.
  • Announcements- A place for admin staff to place all calls to the company
  • Human Resources- A place to post policy changes and directives while containing some helpful links Only HR will be able to post here.
  • Policy and Procedures- a place to discuss policy and make sure everyone is recieving the same information
  • Technology- This is my stuff has access to the help desk and a way for me to create tickets with you and chat in real time
  • Water Cooler -my personal favorite a channel to post good news, pictures, and other off topic items.

Private Channels are for your locations and teams

  • Location Teams- A place for locations to communicate without having to look up everyone’s numbers prevents a lapse in communication! Beats Group Text Easily!
  • Team Channels(TAM, EM, LEADERSHIP)-These channels are more specific to teams you work with.

All Channels I have Access To This will vary based on the person

Channel Tabs


Channel tabs allow for different items to be viewed in a channel allowing for access to specific resources. They are at the top of every Channel by the name of the Channel.


Additional Tabs can be added and Customized as needed.  Any website can be added and wide variety of apps.

One Tab is The Events and Tasks Tab


Events and Tasks

Events and Tasks allow for Easy assignment and tracking of specific things that need done and even allow for assignment.

This an example of Both an Application and a Tab.

if you have issues don’t forget to log a ticket at here. Next week will Focus on Meetings/Calls/ and Apps.

Read this anytime by visiting Cofess and going to Employee News or by utilizing the Knowledge Base.


Filed Under: Employee News

  • « Go to Previous Page
  • Page 1
  • Interim pages omitted …
  • Page 3
  • Page 4
  • Page 5
  • Page 6
  • Go to Next Page »

Footer

Corporate Office

1511 Jackson Street
Monroe, Louisiana 71202
Phone: (318) 325-6231
Fax: (318) 325-6196

Little Rock Admin

1400 S. Garfield Dr.
Little Rock, Arkansas 72204
Phone: (501) 615-1090
Fax: (501) 615-1099

COF-Baton Rouge

6749 Cezanne Ave.
Baton Rouge, LA 70806
Phone: (225) 924-5757
Fax: (225) 924-5822

Chief Executive Officer

Terry Williams
(501) 615-1090
[email protected]

Chief Operations Officer

Allen Winkler
(501) 615-1090
[email protected]

Chief Financial Officer

Troy Adams
(318) 325-6231
[email protected]

Navigation

  • Home
  • Core Values
  • Processes
  • Annual Training
  • My Profile

Copyright © 2025 · City of Faith